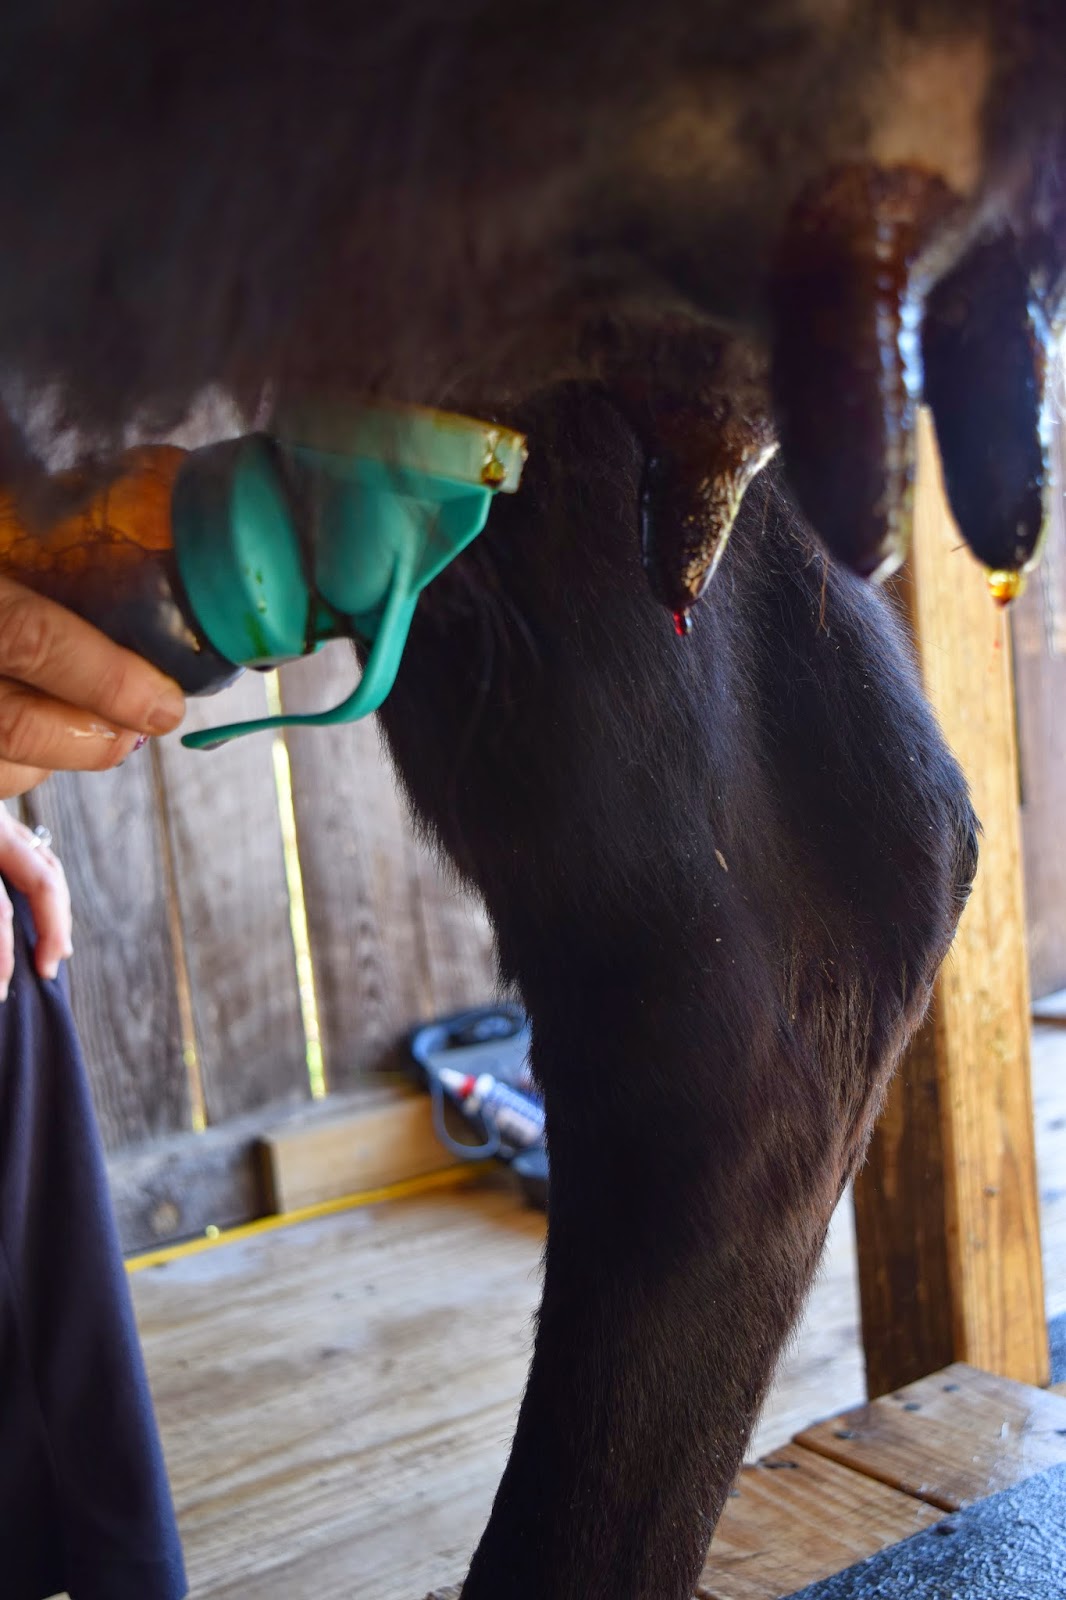
Lately several people have asked how to handle various situations that come up while share milking. Today Ebony treated me to a "situation" of her own devising, and it reminded me that I promised to do a troubleshooting post. (You'll have to stay tuned to see what Ebony did.) These situations are not unique to Dexters, by any means; however, all my experience is with hand milking Dexters. These posts should be read with that in mind, as some of my advice would not be suitable for a high-producing dairy breed. So, what are some of the questions, problems and situations that I've run into with share milking?
Q: When do I start milking?
 First, I always wait until the calf is born. It can be tempting to see if that swelling udder has milk or colostrum or some other substance in there, but God designed cows' teats to be sealed after drying off to protect from bacteria that could enter through an open teat orifice and get up in the udder to cause mastitis.
To help with edema before calving, I brew strong raspberry tea (4 bags to a half cup of water) and pouring it over their feed twice a day. If a cow has a lot of edema, I continue into the first week or more after calving.
So when DO I start milking? It depends! :) It depends on several things:
Last year when Ebby's second calf was born, her milk didn't fully come in until several days later, so she didn't need milking the first 24 hours. This year her third calf was born at 3 in the afternoon, and she was already so engorged with milk before calving that I milked her that evening, after I was sure the calf had gotten a lot of colostrum. I freeze any colostrum I milk out and label it Day 1, Day 2, etc. to keep in case of a future need.
Q: How often do my cows need milking?

Remember, we're talking about Dexters and we're talking about share milking, keeping the calf on its dam instead of pulling it at birth. Dexters are dual purpose cows so they are different from full-blooded dairy cows, meaning they usually produce less milk. (For me, this is an advantage because I want the calf to be my relief milker.)
How often do my cows need milking? The answer is, "It depends."
I started milking Siobhan as a first freshener two months into her lactation, because that's when we got our stanchion built. Her heifer Macree was able to handle all of Siobhan's milk production, and I never had to milk. At first, I milked several times a week. Later I began separating Siobhan and Macree for about 12 hours every night, milking every morning. Remember, regularly taking more milk than the calf needs causes a cow to increase her production, so you then need to keep up with it. Once I had Siobhan's production built up to supply both Macree and the house every day, I would not have suddenly gone off on a trip and assumed that Macree would keep Siobhan's udder empty.
The following year, I had two cows that were both in their second lactation. Both had small calves, and neither calf could keep up with their dam's milk supply until they were about three weeks old. I milked Ebby TAD (twice a day) for almost three weeks--18 days to be exact. At that point we transitioned to milking OAD (once a day). Within a few days, her calf was keeping up with her production and evenly nursing her out on a regular basis. At that point I was able to quit milking--until it was time to milk Siobhan when her calf was born. Things worked out much the same way for Siobhan.
Last year I knew in advance that I would be gone for a week or more on a monthly basis throughout the summer. For that reason, I chose not to milk either cow once their calf could take all the milk they produced. By not driving up their production, I could go on my trips without worrying about a human relief milker. Of course someone still had to come feed and water the animals, but that's a lot easier to find than someone who can milk!
This year, both cows are in their third lactation. Ebby's udder was huge before she calved, so I went to TAD milking immediately. I milked her TAD for exactly three weeks, then switched to OAD. After ten days of milking OAD, I thought her calf, Seb, was keeping her udder fairly evenly nursed, so I tried to stop milking. After a day and a half, I felt that I needed to start milking OAD again. So here, almost 5 weeks into her lactation, I still need to milk many mornings. There is still often one extremely full quarter in the morning. If I can encourage Seb to nurse that quarter, we skip milking. When he won't, I milk that quarter completely out--to be sure things are flowing and milk is not stagnating in that quarter.
Siobhan is due to calve any day. With six weeks between their due dates, I thought I had things arranged perfectly. Ha! Count on cows to remind us they are the ones in charge! Ebony went eight days late, and Seb still hasn't learned to count to four. So I may find myself milking "three" cows a day for a while.
The third lactation is generally when cows hit their peak production. So, although Ebby had a large bull calf this year, I'm not too surprised that I still need to milk her. I fully expect to have to milk Siobhan for a month or more. Some milkers from KFC have said that it can take up to six weeks for a calf to "learn to count to four" so that it equally nurses all four quarters and manages to keep up with its dam's supply.
Q: How do I decide if the cow needs to be milked or not?

The photo above is of Ebby's udder one morning recently, with her teats pre-dipped. Ebby's four quarters are normally quite equal in size, so it was clear that Seb had done a good job of nursing this side. Here's where it's important to know your cow's udder. See how small the rear quarter is (at right)? It always milks down like this, and there's really no mammary tissue to be felt up above. Now see how large and full the front quarter is, especially the forward part (at left)? The "swelling" you see in the front part of the quarter is always there; it's the smaller part underneath, the reservoir, that gets milked out. When I placed my hand on the fuller part on this particular day, I could feel that although it was firm (which is normal), it was not hard. It had been well-nursed by Seb, so I knew this side did not need to be milked.

Here's the right side of Ebby's udder that same day. The rear quarter had been nursed, but not the front (right). Look at the fullness all the way along the front curve of that quarter. The front quarter is clearly rounded and curved, especially where it connects with the rear quarter. It was firm and hard-ish to the touch, so I decided to milk that quarter. Today Ebby came in looking much the same, and I got over three cups of milk from the front quarter alone--of course, she didn't let it all down for me. I milked it all the way out, since it was clear it had not been emptied in some time.
That's how things work THIS year! LAST year those front quarters freaked me out, and I was constantly worried that Ebby was developing mastitis--until I thought to ask her former owner (who had milked her during her first lactation) if Ebby's front quarters were more fleshy than the rear ones? Yes, was her reply--and I heaved a sigh of relief. Sure enough, Ebby's mastitis test came back negative, and all my worry about those firm quarters was for naught. This year I've been careful but not worried, because I know my cow's udder better. It really does make a difference!
To recap, here are some of the situations that might lead me to milk whether I planned to or not:
Q: How do I decide which quarters to leave for the calf?
 Usually, the calf is going to be a more efficient milker than I am. So during the first weeks, if there's a quarter that needs milking, I try to get the calf to nurse that one. I lead the calf into position on that side with its head facing toward the cow's tail and push its head under the udder. With a reluctant nurser, I even bump the calf's nose against the udder several times. Then I stand back and wait for nature to hopefully take its course.
So far, of the four calves I've share milked with, two have been eager nursers who didn't need encouraging, and the last two have been reluctant or shy. Ebby's calf last year was particularly unwilling to nurse "on demand." Seb, this year's calf, may respond to encouragement--or not.
When the calf is on the cow 24/7, the goal of OAD milking is to be sure the cow gets her udder emptied every day. Some people milk out the easiest quarters and leave the more difficult ones for the calf. Some people with a higher producing cow rotate, milking three quarters and leaving a different quarter for the calf each time. With a moderate producing cow, some people rotate sides, leaving the opposite one for the calf. The cow is always going to hold up some milk for her calf, so the calf will not go hungry. At this point I'm milking because the calf can't handle that much milk.
In the past it has worked for me to finish milking out the quarters that were most recently nursed and leave the full ones for the calf. However, this year when I tried that, Ebby would come in the next day with the same quarter un-nursed and extra full. I've learned that Seb goes on "kicks." He almost always nurses the rear quarters, but chooses to ignore the right front for several days. Then suddenly he'll change and ignore the left front for several days. So with this guy, I've learned to milk the fullest quarter all the way out. That way I know it's getting emptied at least once a day.
So, like many of these questions, the ultimate answer to this question is: It depends! It's a process of trial and error, and I figure out what works best as we go.
Q: When do I separate the cow and calf overnight, and how do I do it?
 I don't separate mama and baby until the calf is handling all of the cow's production. That means that she is regularly coming in with all four quarters soft, if not empty.
As I mentioned earlier, I start out milking TAD, transition to OAD, and when the cow is coming in for milking with all four quarters at least partially nursed, then I'm ready to separate them at night.
I've found the best way to separate is to shut the calf in a stall and leave the cow loose to graze, or at least have free access to hay in the barnyard. It's a lot easier to put enough hay and water for the calf into a stall than it is to provide enough for the cow. In addition, I believe that when we switched to putting Siobhan in the stall instead of Macree is when Siobhan got bored and started self-sucking. So that's not an option I'm going to consider in future.
Since I'm not an early riser, and I'm not interested in milking at 6 am, I generally get the calf at about 8 pm to shut it up. If I milk at 9, that's thirteen hours the cow and calf have been separated.
Another option I've used at times is to separate the cow and calf in the morning for six to eight hours and milk in the evening. Again, it depends on what works well for each particular situation.
This post is not comprehensive, but it covers some of the basics about how I approach share milking. If readers have other questions, feel free to ask them! In future posts I'll deal with some of the problems and situations that arise while share milking.
Q: When do I start milking?

To help with edema before calving, I brew strong raspberry tea (4 bags to a half cup of water) and pouring it over their feed twice a day. If a cow has a lot of edema, I continue into the first week or more after calving.
So when DO I start milking? It depends! :) It depends on several things:
- What lactation my cow is in. My first freshener (first lactation) did not need milking at all after the calf was born.
- With my second lactation cows, I milked within twelves hours after the calf was born, depending on how full the udder was. In general, the rule of thumb I follow is that if the calf is born in the morning, I milk the cow that evening If the calf is born at night, I milk the cow the next morning.
- How high of a producer my cow is. Some lower producing cows will be fine without having to be milked, even in later lactations, but I have personally milked my second lactation girls.
Last year when Ebby's second calf was born, her milk didn't fully come in until several days later, so she didn't need milking the first 24 hours. This year her third calf was born at 3 in the afternoon, and she was already so engorged with milk before calving that I milked her that evening, after I was sure the calf had gotten a lot of colostrum. I freeze any colostrum I milk out and label it Day 1, Day 2, etc. to keep in case of a future need.
Q: How often do my cows need milking?

Remember, we're talking about Dexters and we're talking about share milking, keeping the calf on its dam instead of pulling it at birth. Dexters are dual purpose cows so they are different from full-blooded dairy cows, meaning they usually produce less milk. (For me, this is an advantage because I want the calf to be my relief milker.)
How often do my cows need milking? The answer is, "It depends."
- Once or twice a day, especially for the first few weeks.
- A couple of times a week or every day, depending on how much milk I want.
The following year, I had two cows that were both in their second lactation. Both had small calves, and neither calf could keep up with their dam's milk supply until they were about three weeks old. I milked Ebby TAD (twice a day) for almost three weeks--18 days to be exact. At that point we transitioned to milking OAD (once a day). Within a few days, her calf was keeping up with her production and evenly nursing her out on a regular basis. At that point I was able to quit milking--until it was time to milk Siobhan when her calf was born. Things worked out much the same way for Siobhan.
Last year I knew in advance that I would be gone for a week or more on a monthly basis throughout the summer. For that reason, I chose not to milk either cow once their calf could take all the milk they produced. By not driving up their production, I could go on my trips without worrying about a human relief milker. Of course someone still had to come feed and water the animals, but that's a lot easier to find than someone who can milk!
This year, both cows are in their third lactation. Ebby's udder was huge before she calved, so I went to TAD milking immediately. I milked her TAD for exactly three weeks, then switched to OAD. After ten days of milking OAD, I thought her calf, Seb, was keeping her udder fairly evenly nursed, so I tried to stop milking. After a day and a half, I felt that I needed to start milking OAD again. So here, almost 5 weeks into her lactation, I still need to milk many mornings. There is still often one extremely full quarter in the morning. If I can encourage Seb to nurse that quarter, we skip milking. When he won't, I milk that quarter completely out--to be sure things are flowing and milk is not stagnating in that quarter.
Siobhan is due to calve any day. With six weeks between their due dates, I thought I had things arranged perfectly. Ha! Count on cows to remind us they are the ones in charge! Ebony went eight days late, and Seb still hasn't learned to count to four. So I may find myself milking "three" cows a day for a while.
The third lactation is generally when cows hit their peak production. So, although Ebby had a large bull calf this year, I'm not too surprised that I still need to milk her. I fully expect to have to milk Siobhan for a month or more. Some milkers from KFC have said that it can take up to six weeks for a calf to "learn to count to four" so that it equally nurses all four quarters and manages to keep up with its dam's supply.
Q: How do I decide if the cow needs to be milked or not?

The photo above is of Ebby's udder one morning recently, with her teats pre-dipped. Ebby's four quarters are normally quite equal in size, so it was clear that Seb had done a good job of nursing this side. Here's where it's important to know your cow's udder. See how small the rear quarter is (at right)? It always milks down like this, and there's really no mammary tissue to be felt up above. Now see how large and full the front quarter is, especially the forward part (at left)? The "swelling" you see in the front part of the quarter is always there; it's the smaller part underneath, the reservoir, that gets milked out. When I placed my hand on the fuller part on this particular day, I could feel that although it was firm (which is normal), it was not hard. It had been well-nursed by Seb, so I knew this side did not need to be milked.

Here's the right side of Ebby's udder that same day. The rear quarter had been nursed, but not the front (right). Look at the fullness all the way along the front curve of that quarter. The front quarter is clearly rounded and curved, especially where it connects with the rear quarter. It was firm and hard-ish to the touch, so I decided to milk that quarter. Today Ebby came in looking much the same, and I got over three cups of milk from the front quarter alone--of course, she didn't let it all down for me. I milked it all the way out, since it was clear it had not been emptied in some time.
That's how things work THIS year! LAST year those front quarters freaked me out, and I was constantly worried that Ebby was developing mastitis--until I thought to ask her former owner (who had milked her during her first lactation) if Ebby's front quarters were more fleshy than the rear ones? Yes, was her reply--and I heaved a sigh of relief. Sure enough, Ebby's mastitis test came back negative, and all my worry about those firm quarters was for naught. This year I've been careful but not worried, because I know my cow's udder better. It really does make a difference!
To recap, here are some of the situations that might lead me to milk whether I planned to or not:
- A full, firm quarter instead of a partially full or flaccid quarter.
- One quarter or side that has not been nursed, especially on a regular basis.
- If a cow has edema (pitting fluid retention) in her udder and/or umbilicus, I massage and milk, even if not much milk comes out. Keeping things flowing is important, especially if there's congestion in the udder.
- Any redness (which is hard to see on a black Dexter!), heat (compared to the other quarters), or clumps in the milk. (I'll talk more about clumps later.)
Q: How do I decide which quarters to leave for the calf?

So far, of the four calves I've share milked with, two have been eager nursers who didn't need encouraging, and the last two have been reluctant or shy. Ebby's calf last year was particularly unwilling to nurse "on demand." Seb, this year's calf, may respond to encouragement--or not.
When the calf is on the cow 24/7, the goal of OAD milking is to be sure the cow gets her udder emptied every day. Some people milk out the easiest quarters and leave the more difficult ones for the calf. Some people with a higher producing cow rotate, milking three quarters and leaving a different quarter for the calf each time. With a moderate producing cow, some people rotate sides, leaving the opposite one for the calf. The cow is always going to hold up some milk for her calf, so the calf will not go hungry. At this point I'm milking because the calf can't handle that much milk.
In the past it has worked for me to finish milking out the quarters that were most recently nursed and leave the full ones for the calf. However, this year when I tried that, Ebby would come in the next day with the same quarter un-nursed and extra full. I've learned that Seb goes on "kicks." He almost always nurses the rear quarters, but chooses to ignore the right front for several days. Then suddenly he'll change and ignore the left front for several days. So with this guy, I've learned to milk the fullest quarter all the way out. That way I know it's getting emptied at least once a day.
So, like many of these questions, the ultimate answer to this question is: It depends! It's a process of trial and error, and I figure out what works best as we go.
Q: When do I separate the cow and calf overnight, and how do I do it?

As I mentioned earlier, I start out milking TAD, transition to OAD, and when the cow is coming in for milking with all four quarters at least partially nursed, then I'm ready to separate them at night.
I've found the best way to separate is to shut the calf in a stall and leave the cow loose to graze, or at least have free access to hay in the barnyard. It's a lot easier to put enough hay and water for the calf into a stall than it is to provide enough for the cow. In addition, I believe that when we switched to putting Siobhan in the stall instead of Macree is when Siobhan got bored and started self-sucking. So that's not an option I'm going to consider in future.
Since I'm not an early riser, and I'm not interested in milking at 6 am, I generally get the calf at about 8 pm to shut it up. If I milk at 9, that's thirteen hours the cow and calf have been separated.
Another option I've used at times is to separate the cow and calf in the morning for six to eight hours and milk in the evening. Again, it depends on what works well for each particular situation.
This post is not comprehensive, but it covers some of the basics about how I approach share milking. If readers have other questions, feel free to ask them! In future posts I'll deal with some of the problems and situations that arise while share milking.