Stories of life on our farm in Northwest Georgia where every day is an adventure in this beautiful spot that God has entrusted to our stewardship.
Showing posts with label Pasture-raised. Show all posts

Saturday, February 13, 2016

The Cost of Raising a Steer on Pasture vs. On a Factory Farm

One of my most popular posts ever (second only to the one on the cost of raising pigs) has been this one: The Cost of Raising a Steer:  How Much Does Our Beef Cost Us?  Over the three years since I posted this, I've gotten several questions in the comments.

Today I got a real poser, and I'd like to share it with you:
"I have a project for school due soon and one thing I have to figure out is how much it costs to raise a free range cow, versus the cows treated in factories, and how much money is made from each of them. If you happen to know any of this information that would be amazing and greatly appreciated for my project is due on Tuesday. Thx so much and pls respond asap, your information is already so useful and you seem like a very knowledge person for this type of thing, thx and hope to hear back. :-)"
Let me start with a disclaimer:  I am NOT at all knowledgeable on this subject!  Everything I know about it I did NOT learn in kindergarten. In fact, everything I know about this subject I have learned from other people who ARE very knowledgeable on the subject.

I do, however, love our cattle.  I love what we're doing and I love sharing what I've learned.  So now that that's settled, how did I answer this young person's question?

Their question was so good and the answer so complicated that I thought they deserved their own post.  So thank you, Tristan, and here's the answer to your question . . .


I'll try [to answer], but this question doesn't have a black-and-white answer that you can write down in neat columns to compare. I hope your teacher or professor will be open to seeing this. I listed the costs for raising our pastured steer in this post; unfortunately, I can't give you a comparative number as if he had been raised in a CAFO (Concentrated Animal Feeding Operation) or factory farm. In fact, I doubt any such number exists, and here's why: 
The costs of raising beef in CAFOs far exceeds the list of expenses that get written down on paper. The feed is GMO (Genetically Modified Organism) and a high concentration of grain, which is not the natural food a cow's rumen is designed for. This creates health issues for the animal. In addition, the crowded conditions lead to disease and injury, which requires the use of antibiotics, which contributes to antibiotic resistance when the meat passes into the food chain for humans. Then there's the problem of waste disposal from all the animals crowded together in one place, leading to flies, pollution, odors and a general negative environmental impact. These are just a few of the related impacts which can't be quantified--and that is without even mentioning the quality of life for the animal. 
Here's a link to an article that has photos of two ways to raise cattle.  I think that illustrates the ethical issue of humane treatment very clearly, in addition to the issues of overcrowded animals in unhealthy conditions.
Here's an excellent interview with Michael Pollan on PBS, talking about a feedlot steer he bought and followed through its process to learn some of the things you're asking about.  In this article he mentions the statistic that if an animal is fed grass or hay for the last few days of its life, the E coli in its intestines plummets by 80%. But the CAFO way of handling this problem is to throw antibiotics at the animal, and those are passed on to us in the beef. This Michael Pollan article is very long, but it's a thorough discussion of some of the issues I've mentioned, and more. 
You'll notice there aren't very many numbers in that article! But I believe it clearly shows that the cost of raising beef in CAFOs instead of on pasture is one our society can't afford. I hope this helps you with your paper.

My answer to Tristan's question came from things I've learned from many other, much more knowledgeable people.  But I have learned a few things myself.  As a firm believer that a picture is worth a thousand words, here are some of things that I've learned personally . . . 


You can't calculate these things on a balance sheet, but they are very, very real.  Be sure to show this post to your teacher, Tristan--and I guarantee you'll get an "A" on your paper!

Thursday, October 9, 2014

Our Dexter Breeding Priorities

A reader recently asked how we determine what to breed for, and it got me thinking.  There are certain things that are very important to us in our breeding program, others that are less so.  But we had never sat down and put a list in writing, much less tried to list our priorities in order.  It took a lot of thinking and re-writing!  So here, by request, is a first attempt to list our priorities for breeding.  NOTE: This list is subject to re-evaluation and change, and we reserve the right to throw it completely out the window if we so choose!

Our Breeding Priorities

1) Temperament. For us, if our Dexters are to be family cows, good temperament is an absolute requirement. Warning: Aggressive animals will be eaten on our farm!


We halter train our heifers, and our bull is halter-trained. It so happened that we needed to move both him and a heifer in season from one pasture to another. We put his halter on, clipped a lead rope on hers, and we each led one. It went very well. Of course we don't TRY to plan to disrupt a breeding pair, but it's good to know that if we have to, we can safely do it.


Many are the times we've been thankful to be able to walk up to an animal in the pasture, put on a halter or clip on a lead, and take it where we want it.


It's extremely important to me that my cows don't kick or even look like they want to when I'm milking and that I can handle their calves without trouble. For us, this is the essence of a "Family Cow."

2) Calving ease. Any cow can have a wrong presentation and a difficult delivery; if it happens again, it's time to check whether the cow has a problem. A low-birth weight bull is a great asset to calving ease. One of the best things about our Dexters (and Dexters in general) is that they have calved without difficulty and have good mothering skills with little or no help from us. Waking up in the morning to a healthy, dry, nursed calf is a huge blessing!

3) Dual purpose, meaning equal emphasis on beef and milk. For beef you want good muscling, length, good width across the body, and good depth through the heart girth.


For milking you want good milk production with plenty of butterfat and protein (also necessary for raising a healthy calf). You want good udder conformation with a level floor, good front attachment, high rear suspension, good spacing of teats and well-shaped teats. A cow with "sausage teats" that a small calf can't get hold of to nurse becomes a burden.


Temperament is especially important for a true dual purpose animal. The cow with the greatest milk production in the world is worthless if she tries to kick your head off every time you milk her!

4)  Good conformation.  We wouldn't cull an animal with less than perfect conformation if it has other good qualities.  We would breed it to a better animal to try to improve on its faults.  This is why a good bull is so important, since he is going to contribute his genes to every calf born on the farm.

Good feet are an often over-looked part of conformation, hidden away in the grass as they often are.

Note:  One of my pet peeves is breeders whose animals have "good confirmation."  We have yet to take a cow to church and serve it communion, and until we do, I'm afraid none of our animals will have "good confirmation!"  But we hope they will have good conformation!


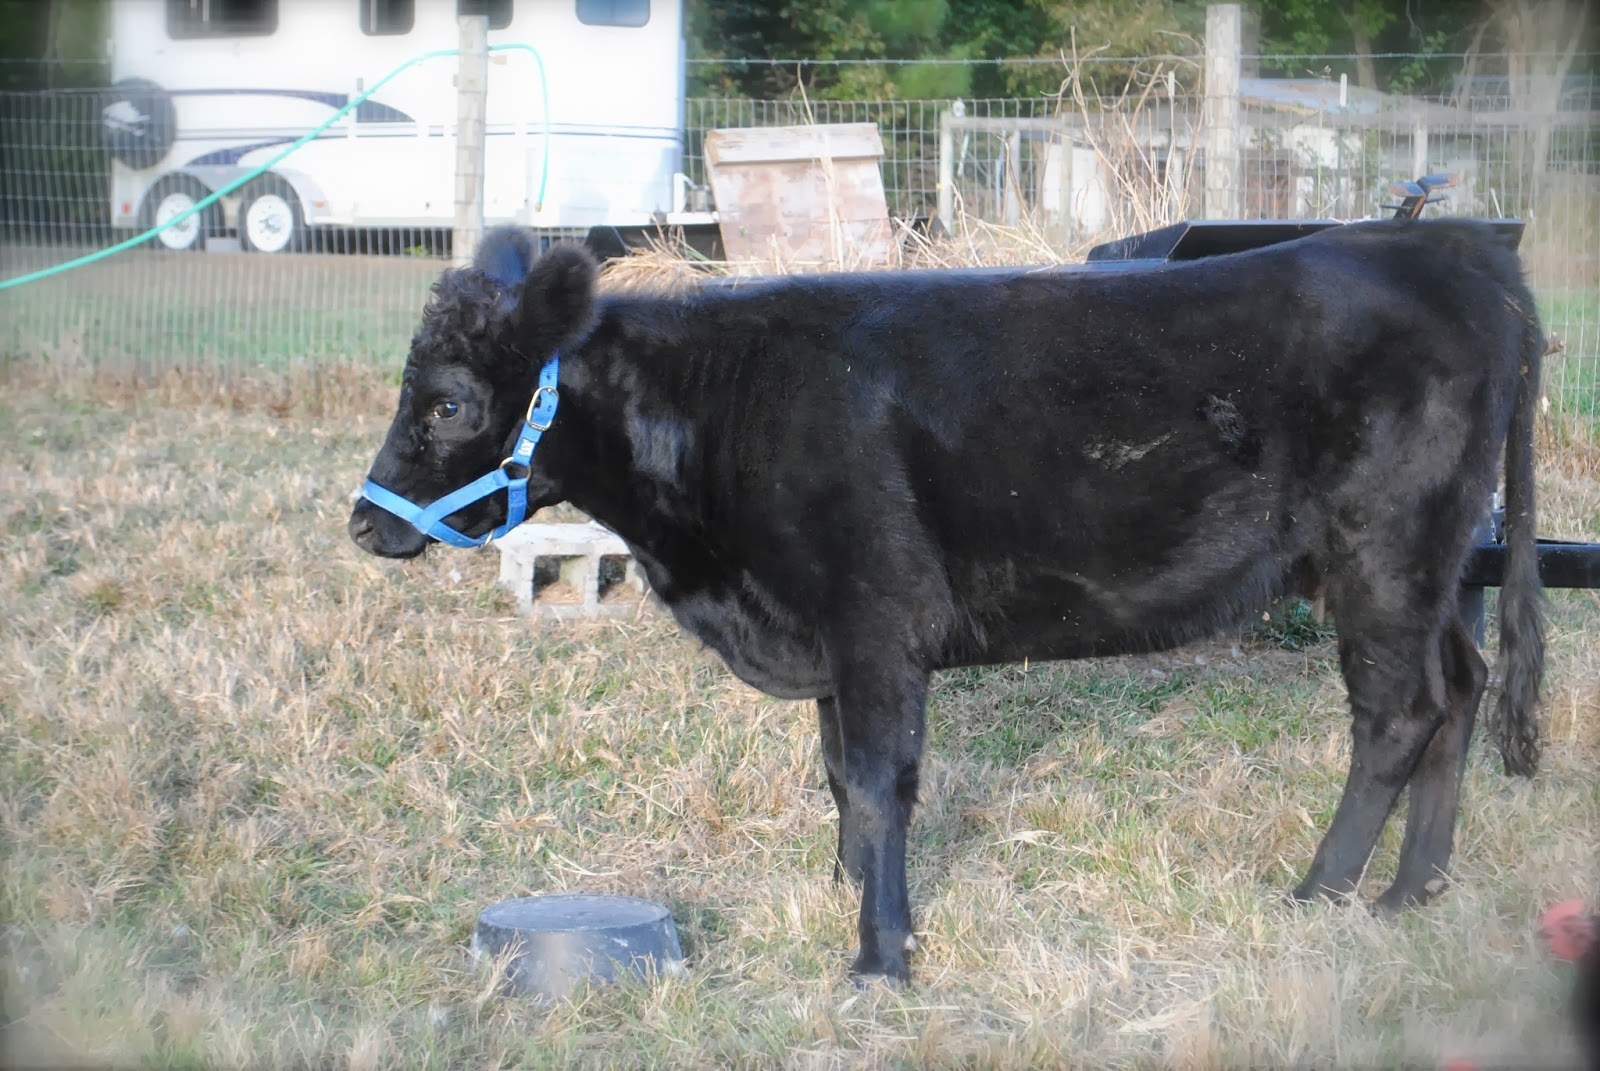
5)  Polled.  Our foundation cow  (left) had horns, and we knew we didn't want to deal with them, so choosing a homozygous polled bull for her was a very high priority.  Our  current herd sire is heterozygous polled.  Being homozygous polled would have made him "Perfect," but he is so excellent in every other respect that we wanted him even with one horned gene.  With all our breeding stock being heterozygous polled, we will eventually have a horned calf, but we are willing to dehorn it.  What we don't choose to do is to keep both horned and polled animals together.  For our safety, the safety of our grandchildren, and the safety of our other animals, we have chosen to go hornless.

6)  A2 status, homozygous A2 (A2/A2).  The photo of our granddaughter eating yogurt is here because our family's health is the main reason we are interested in the whole A2 issue.  While it may not have been conclusively proven to the satisfaction of the dairy world at large, we like the idea of breeding for A2.  When we decided not to keep our A2 foundation cow (pictured above), we did decide to replace her with her better-tempered, polled, A2 granddaughter.  However, we plan to keep our A1/A2 cow because of her sweet temperament and easy keeping.  In looking for our herd bull, homozygous A2 status was a priority.  You can cut horns off, but you can't filter the A1 out of the milk!  However, A2 is only number 5 on our list because we feel other things are more important.

7)  Grass-based.  Also for our family's health, we want to raise grassfed beef.  Our steers should finish well on grass, and our cows should be able to raise healthy calves without a lot of supplemental grain.  Currently we feed one cow 4 pounds of 16% protein feed a day, while the other gets 3.  Their calves are 6 months and 4 1/2 months old, respectively, so both are at their peak lactation.  Both calves are on their dams full time with grass, hay and minerals.  Both are healthy and shiny and chunky.  Our vet is happy with the condition of the cows on this amount of feed, less than the rule of thumb would dictate.  (The rule of thumb is 3 pounds of 16% protein per gallon of milk.)  I know of full-sized dairy cows that consume a 5-gallon bucket of grain twice a day.  Ours get four (or fewer) tomato-cans full per day!

8)  Size.  Our aim is to stay within the ADCA height guidelines.  Again, we would not necessarily cull an animal based on this, but we will breed toward that goal.  We love Dexters partly because of their size, and we have no desire whatsoever to "upsize" them to get more beef or more milk.

9)  Color.  I put this last because it's just the gift wrap, as far as we're concerned.  Beef and milk from black, red or dun cattle taste exactly the same.  That being said, we were thrilled to get our first red calf this spring.  They sure look pretty on the green grass, they're a lot easier to spot at night, and there's anecdotal evidence that they are less troubled by flies.  (That's something we'll be watching.)  Both of our cows carry red, and now that we have a red herd sire, we'll be getting some red calves.  That's just window dressing--fun, but not important to us.

There are other things I didn't list, even some things we test for (or will test for).  Here's why they didn't make the list:

PHA - All of our animals are PHA-negative and always will be.  There would be absolutely no reason to add a PHA-positive animal to our herd.  I believe that almost every Dexter breeder with a PHA-positive cow is trying to breed a replacement heifer.  Many with PHA-positive bulls have castrated them, despite their other great qualities.  We don't test for PHA any more because our animals are obligate non-carriers.

Chondrodysplasia - We bred a cow to a chondro-positive bull, twice.  We got one sweet non-carrier heifer and a carrier bull (pictured above).  While we love our sweet, chondro-positive bull calf, we have personally decided not to breed chondro carriers.  We will be castrating this bull calf and raising him for beef, NOT because of his chondro status, but because of his dam.  And THAT is another post for another day: "What Makes a Bull Mother?"  Meanwhile, he's looking like mighty tasty beef!

Kappa Casein & Beta Lactoglobulin - These are milk components that can be tested for with other DNA tests.  If they were computer programs, you might call them A2-2.1  They relate to cheese-making, and while they are interesting--and we've already tested one animal for them--they will never be a reason to cull an animal.  They fall into the Fun-to-Know category, that's all.

So there it is, our breeding priorities at 6:29 p.m. on October 8, 2014.  And now we've got some hungry animals waiting for hay!

Saturday, December 21, 2013

Tum! Tum! Tum! Tum! or How Many Stomachs Does a Cow Have?

Quick, without looking it up, how many stomachs does a cow have?

Did you guess "four?"

Well, you're almost right.

Don't worry, I grew up hearing that cows have four stomachs, too!  You could say cows have one stomach with four parts.  But to be strictly accurate, they really have three pre-stomachs which are actually part of their esophagus along with one real stomach.

Here, then, is everything you've always wanted to know about a cow's stomach--and then some!

Get ready to be shocked, moms:  Cows don't properly chew their food before they swallow it.  And get ready to be grossed out, kids:  Cows belch their food back up from their stomach into their mouths, then chew it and swallow it again!  Sorry if that was T.M.I., but if you're a sucker for yuck, here's how it works . . .

Because a cow doesn't have upper teeth in front, she sweeps up grass or hay with her rough tongue, pinches it between her lower teeth and a "dental pad" (where your top teeth are), and rips it off.  She chews it briefly to mix it with saliva in her mouth (especially important for dry hay), and then swallows it.  By the way, a cow can produce over 20 gallons of saliva a day.  She recycles much of the water in that saliva--and that's probably all you want to know about that!

Image from Animal Corner.co.uk--http://www.animalcorner.co.uk/farm/cows/cow_anatomy.html


The four digestive compartments in the cow are called:
  1. The Rumen is where the term "ruminants" comes from.  The rumen is the largest compartment, containing up to 50 gallons of food in a full-size cow.  (Of course, a Dexter's rumen is proportionally smaller.)  The rumen is full of good bacteria, molds, yeast, etc.  When I say "full," I mean numbering in the billions!  These microorganisms live in harmony with the cow and break down the food to enable her to digest it.  The rumen with all its micro-organisms is particularly designed to digest grass and hay which would be mostly indigestible to humans.  After bacteria in the rumen begin to break down the food, the cow regurgitates a "bolus" of partially chewed food into her mouth to chew it again.  This is called "rumination" or "chewing her cud."  When the cow swallows the chewed cud it goes directly into other chambers of her stomach.  (Who knew a cow has a "smart stomach" that knows where to send the food?!)  The cow also "eructates" or belches, emitting carbon dioxide and methane. 
  2. The Reticulum, with its lining that resembles a honeycomb, works along with the rumen to circulate the undigested food and keep the rumen from getting clogged.  When a cow swallows her partially-chewed mouthful, the liquid part goes into the reticulum while the solid part goes into the rumen.  Remember that cows pull grass and hay into their mouths with their tongues and don't chew it well?  Unfortunately, sometimes along with her food, a cow swallows other stuff that is lying around.  Things like pieces of barbed wire, rocks and nails can end up in a cow's reticulum.  This causes "hardware disease," a very serious condition that is difficult to treat, but fairly easy to prevent.  Stay tuned for a future post!  
  3. The Omasum is where the chewed cud ends up.  It serves as a pump to move the food on into the real stomach, the abomasum.  The omasum is sometimes called "the book" because it has many leaves like the pages of a book.  It reabsorbs water, sends small food particles on to the abomasum and sends larger pieces of food back to the reticulum and rumen for a "do-over."
  4. The Abomasum is called the "true stomach."  It functions like a human stomach using acid and enzymes to begin protein digestion.
Up close and personal!  Sara "ruminates" or chews her cud.
A cow's "four tums" (or as you now know, three pre-tums and a real tum) allow her to efficiently turn grass and hay into life-sustaining energy for herself and milk for her calf . . . and some for her humans, too.  The cow chews her cud about eight hours a day, a sign that she is healthy and happy.

So move over California, happy cows come from anywhere as long as they're chewing their cud!

The information in this post came largely from the following online resources:
Virginia Cooperative Extension, Digestive System of the Cow by John B. Hall and Susan Silver
The Dairy Mom blog, Content Cows Chew Cud, by Brenda Hastings

Monday, November 11, 2013

Goodbye, Rambo and Obaama

Last Tuesday we moved the trailer into the Home Pasture with the sheep.  (Technically, they're still lambs under 18 months old.)

I put a feed tub in the trailer and sprinkled some feed on the ramp.  Rambo was quite curious while Obaama was more cautious.

Rambo figured out a way to reach the feed without having to go up the ramp.

It didn't take Obaama long to brave the ramp and get his share of the feed.  It took about five minutes for them to adjust to the idea of getting fed in the trailer.  Later on, long after the feed was gone, one of them was all the way in the trailer still looking for more.
By Friday we knew we could get both sheep all the way in the trailer, so we called Triple H Meats to tell them we were coming up.  As ever, Rambo was the tough, brave one.

Obaama was still shy--he hasn't changed from the day Matt had to drag him out of his truck!  Well, he has gotten a lot bigger!

I think Misty knew something was up.  She's already seen her charges (pigs, in this case) disappear into the trailer in the pasture and never come back.  I'm sure she has no idea what's actually happening, but you can tell from her face that she knows this is goodbye.

Herb gave Rambo and Obaama a nice, smooth ride up the mountain and backed skillfully up to drop them off.  At that point they both decided they wanted to stay in the trailer, and it was all Herb could do to wrestle Rambo off while Corey and I held metal roof panels up along the side of the ramp to prevent a prison break.  Once Rambo got off the trailer, Obaama was right behind him.  We left them there looking fairly calm and relaxed.  Rambo had the last word:  "Bleah!"

I talked to the butcher today about setting aside some meat for sausages, and he said, "Those are really fine sheep!  Do you have any more?"  So Rambo and Obaama, you may not have made us love raising sheep, but you made a good impression on the butcher!  And I'll definitely miss your photogenic qualities out in the pasture!


Saturday, September 28, 2013

Quick and Easy, Fool-Proof Chili

Company coming . . . what to fix?  Try my favorite cool-weather recipe:  Wick Fowler's 2 Alarm Chili turned into No-Alarm Chili for tender taste buds.  It only takes half an hour to make.  In fact, it will probably take you longer to read this post than it will to make the chili!  But read the post, anyway!  The way I make it, it pretty well fills up a 6-qt. crock pot and will feed 8-12 people, depending on their greediness!

Here's the package back showing ingredients and directions.  I change it up a bit, of course--I'm allergic to following any recipe!

For my version:

Break up 2-3 lbs. of ground grass-fed beef and pastured pork into pecan-sized bits and brown on medium-low heat.  The more meat you use, the milder-flavored your chili will be.

Use 1 28-oz. can of crushed tomatoes.  I like Cento brand best because they're thick, not runny.  You can opt to use tomato puree for less texture or you can crush canned whole tomatoes with your hands, but it's more work and the chili won't be as rich and tomato-y.

Instead of water (that's for ducks!) use 1 bottle (forget cans!) of good beer.  Negra Modelo or Dos Equis are good.  This time I used Guinness Stout.  
Very Important:  Taste the beer first to be sure it's good!  You do not want to ruin your chili with bad beer!  :)


Follow the Mild Chili directions.  More in a minute.

Stretch your chili with canned beans.  I usually add about 1 15.oz. can per pound of meat.   My favorite is dark red kidney beans, but I also use black beans, pinto beans, or light red kidney beans as the mood strikes.  Adding beans makes the chili perfect for "Make Your Own Taco Salad" or "Mexican Pile-Up."

Since this recipe is as easy as browning meat and opening cans, I didn't insult your intelligence by posting photos of that process.  I'll just give a quick run-down of the steps:


  1. Brown the meat in a skillet over medium-low heat.
  2. While periodically stirring the meat (too much manipulation or too-high heat can make it tough), I heat the crock pot on high.
  3. Drain and rinse the beans in a colander, then dump them into the crock pot.
  4. Add the tomatoes on top of the beans.
  5. Use the beer to rinse out the tomato can and pour the entire bottle (minus your taste test; don't worry--the chili is going to simmer and kill any germs the beer didn't kill) into the crock pot.
  6. Drain the browned meat in the same colander.  You can put a bowl of your dog's food under the crock pot, and he will thank you at supper time!
  7. Add the browned meat to the mixture in the crock pot and stir well.

In case you were wondering what the sign behind the crock pot says, here it is!

Now comes the fun part!  Open the Wick Fowler's 2 Alarm Chili Kit box and take out the goodies inside.  Separate them into three piles:


  1. Chili powder, salt, cumin/oregano, onion/garlic and paprika in front.
  2. Masa in the middle.
  3. Red pepper in back.
Now put the red pepper packet back into the box.  Save the box for the directions.  When you're done you will toss the box with the hot pepper inside!  This will ensure that you won't accidentally put the hot cayenne pepper into the chili, making it inedible.  Trust me, it will have plenty of flavor and a bit of heat without the cayenne!

Here's a look at the spices you're going to use right now in assembling your chili.  Note:  You could stock chili powder, cumin, oregano, onion flakes, garlic flakes and paprika.  You could try to figure out the right proportions.  Then you could open 6 jars, measure all the spices into your chili, close the jars and put them away.  Or you could just be smart and pick up a package of Wick Fowler's 2 Alarm Chili Kit at the grocery store.  You decide!

Grab a scissors, cut open the packets and dump them onto the chili.  It's that easy, and you're almost done.

Stir the chili and keep the crock pot on "High" until it simmers.

After the chili simmers, take 1/4 c. of warm water, dissolve the masa into it, then stir it into the chili.  You can then turn the crock pot to "Low" and leave it.  Contrary to what the directions say about simmering 15 minutes, there will be enough heat left in the crock pot to thicken the masa mixture.  This saves you from having to remember to come back and turn the crock pot down later, and it ensures your chili won't have a burned taste if you forget.

Now you just have to wait till supper time!  While you're waiting, briskly scratch this photo on your computer screen with your thumbnail to enjoy the odor of simmering chili.

We like to serve the chili on top of corn chips and top it with:

  • Grated sharp cheddar cheese
  • Chopped sweet bell peppers
  • Chopped tomatoes or cherry tomatoes
  • Lettuce
  • Sour cream
  • Salsa
  • Guacamole
We call this "Make Your Own Taco Salad," but I like our friends' name better:  "Mexican Pile-Up."

Be sure to have plenty of cold beer to serve with the chili.  Your guests will probably prefer if you don't taste test those bottles!

This recipe is so easy and the result is so delicious, it's almost a crime not to invite someone over for dinner!  If you're lucky and your guests aren't too greedy, you'll probably have enough leftovers for supper tomorrow.

Bon appetit!

Wednesday, July 10, 2013

The Fast Food Burger: The Un-Meat

Check out this informative post from Realfarmacy.com.

WARNING:  Do NOT read while eating a fast food burger!


The end of the post says it all:  Buy your meat from a local farmer who raises grass-fed beef!  Their animals have a better life, and their meat is better for you!

Sunday, January 13, 2013

The Cost of Raising a Steer: How Much Does Our Beef Cost Us?

I just calculated the cost of our beef from the day we brought T-bone home on July 23, 2011 to the day we put the beef in the freezer in early December, 2012.


We bought T-bone from Gabriella Nanci, a Dexter breeder in the Atlanta area.  He was about 8 months old, the same age as Siobhan (in front in the photo above, still wearing her fuzzy calf coat).  Because T-bone was on the small side, we got him for $400.  T-bone was still intact when we got to Gabriella's farm, but she helped Herb use the California bander to "steer" him so we had no vet cost for that.  Gabriella told us he would gain weight better if left intact, but at his age we were worried about him breeding the cows so we opted to castrate him immediately.


That first winter (2011-12) we fed hay to the three cows and two horses.  I'm sure that Angel and Brandy (at 1000+ lbs.) ate more than the cows (with Sara the biggest at about 750 lbs. max).  By June 28, 2012 (almost a year later) T-bone had grown well although his hind end was still on the scrawny side.  Since it's impossible to know exactly how much hay any one animal ate, I calculated the cost as follows:

12 round bales @ $35 = $420 divided by 5 = $84 as T-bone's share of hay.  Because our cattle are strictly grass-fed, we had no other feeding costs.


Six weeks later on Aug. 12, 2012, T-bone was showing the results of eating plenty of good green grass, thanks to a rainy July.  The ideal age to butcher a Dexter steer varies between 24 to 30 months.  While discussing the best time with our butcher, Jeff McBryar, he advised that we should butcher T-bone shortly after the first frost when the grass would stop growing.  We could feed him up on hay for a couple of weeks first, but if we tried to over-winter him, he would lose so much condition on just hay that it would take most of the following summer to regain the lost ground.  For this reason, we decided to butcher him in November at 24 months rather than waiting till he reached 30 months in May 2013.


We took T-bone to Jeff for butchering on Nov. 20, 2012.  Jeff doesn't have a scale, so we weren't able to get a hoof-weight for T-bone, and his assistant Cory didn't get us a hanging weight, so unfortunately we can't calculate a rate of yield this time.  We'll know better next time!  What we did get was a total of 277.17 lbs. of beef.  Here's the final break-down for our first Dexter beef:

Production Cost for Our Steer
Purchase of 1 steer (July 2011)                      $400.00
Hay (winter 2011-12)                                        84.00
Butchering/processing Fee (Nov. 2012)          231.00
Total Production Cost for our steer           $715.00

That's a net price of $2.58 per pound.  We're thrilled with the dark red, tender, delicious beef we got.  Cory told us that these are some of the nicest steaks he's ever seen, and we can testify to them being some of the best-tasting we've ever had!