Stories of life on our farm in Northwest Georgia where every day is an adventure in this beautiful spot that God has entrusted to our stewardship.
Showing posts with label Curing Pork. Show all posts

Saturday, January 12, 2013

The Cost of Raising a Pig: How Much Does Our Pork Cost Us?

I've finally done the calculations on how much it cost us to raise this year's pig from the day we fetched her from Jim Gifford's farm to the day we packed the pork into our freezer.


We brought Spamela Anderson and her sister, Hammy Faye Bakker, home on June 3.  Jim estimated that they weighed 100 lbs, and said they were a bargain at $80 each.  (Since we knew we'd be butchering a steer and didn't have room in our freezers for two pigs, but felt it would be cruel to raise one pig alone, some friends bought Hammy Faye and reimbursed us for her food.  They got a pig at cost without paying for our labor while we got to have a pig.)


By Sept. 14, the pigs were each eating 1 lb. of chicken crumble twice a day.  They ate a total of 950 lbs. of feed between June 3 and Nov. 13, for a cost of $278.03.  They also got copious scraps from house and garden (mostly vegetables).  For the last six weeks or so, they got a pound or more of acorns a day.


On Nov. 3 at approximately 35 weeks of age, we checked their string weights.  Spamela weighed about 301 lbs. while Hammy Faye weighed 319 lbs.   To determine how to divide the feed costs, we calculated the pigs' weights as percentages.  Spamela was 48.55% and Hammy Faye, 51.45%.  So our share of the feed cost was $134.98 (48.55% of $278.03).


The pigs were butchered on Nov. 13.  The butcher guessed their weights as:
Spamela - 378.81 lbs.
Hammy Faye - 391.18 lbs.
(Clearly, our string weights under-estimated their actual weight.)

Their hanging weights were 190 lbs and 198 lbs., respectively.

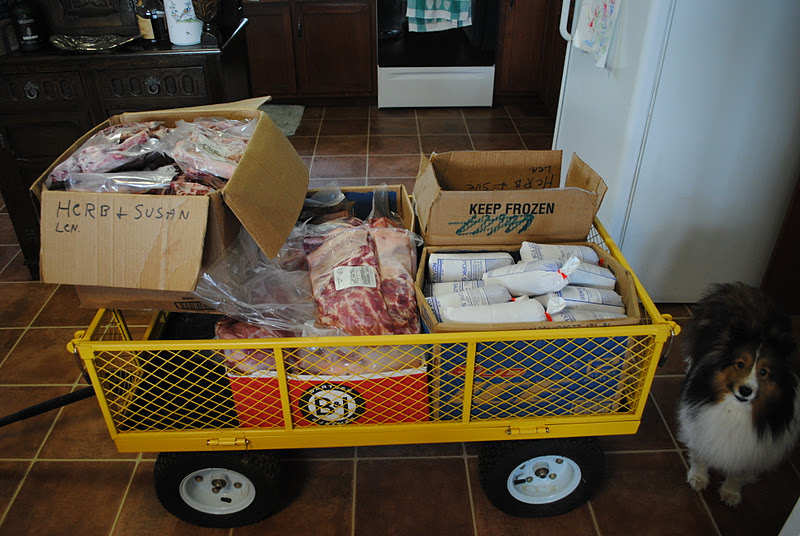
Our pig's butchering and processing fee, based on her weight, was $158.50.  This included the cost of curing and smoking the bacon (over 20 lbs.) and hams (over 40 lbs.).  We came home with 151.02 lbs of pork, including about 3 lbs. of fat, but excluding the weight of bones.


Here's the final break-down:


Production Cost for Our Pig
Purchase of 1 pig                                                      $  80.
48.55% of feed cost                                                  $134.98
Butchering Fee for our pig                                       $158.50
Total Production Cost for our pig                    $373.48

That's a Net Price of $2.47 per pound.  

We're thrilled with that price for delicious pasture-raised, acorn-finished pork.  And that doesn't begin to calculate the enjoyment we got from raising Spamela and Hammy Faye! 

Sunday, January 8, 2012

Looking Back: Things We've Done Right

Things we’ve done right in our three years here:

1)  Getting chickens.  That includes having our own layers and learning to butcher our own meat chickens.

2)  Getting Dexters.  While Sara is not the best representative of the breed, she has given us a marvelous heifer, and Siobhan has convinced us that we love cows, particularly Dexters.  The very helpful and friendly Dexter breeders we’ve met have also contributed to our enthusiasm.

3)  Getting pigs.  Herb getting to meet the Large Blacks at Nature’s Harmony Farm changed his perspective on pigs, and he caved in to my pleading for a pig when I found some on craigslist.  Now we’re both pig fans!

4)  Getting Muscovy ducks to eat flies in the barnyard.  Besides doing exactly what we raised them to do, they are beautiful and fun to watch.

5)  Finding Jeff McBryar, our butcher, and Jim Gifford, the breeder of our Berkshire crosses.  It’s so helpful to have local contacts that we can trust for their expertise in their particular area.

6)  Getting a smoker and vacuum sealer.  We are hooked after smoking our own bacon and ham, and Herb will probably smoke anything that lies still, including fresh salmon at Christmas.  The vacuum sealer will prevent freezer burn in our meat and produce.   It has even been useful in packaging bubble-wrapped bottles of homemade liqueur for air travel.

7)  Reading blogs.  I have learned so much from reading blogs, particularly Farming in France, Hope Refuge Farm, Sugar Mountain Farm, and Throwback at Trapper Creek.  I used to follow Nature Harmony’s Farm blog when they still had one, and this led us to their summer Farm School which was a tremendous help in giving us insight and direction—and leading us to pigs!

8)  Getting a generator.  It could have been a serious mistake not to get one sooner, but Herb managed to find one in time to save our meat last time the power went out.

9)  Making improvements over the past three years.  These include:

  • Getting our Kubota L-series tractor, one of the best decisions we've ever made.
  • Fencing our 20 x 30’ garden.
  • Fencing the barnyard.
  • Fencing the Home Pasture with no-climb horse fence so our tiny Dexter calves can be safe.
  • Hiring a crew to link all our fences and give us the large new pasture we call Kara’s Pasture.  They came with ideas that saved hundreds of feet of fencing, made our pastures more functional, and got the job done in a fraction of the time that Herb could have done it alone.
  • Converting half of a surplus shed into a brooder house.
  • Building a large chicken coop and moving it to the safety of the barnyard with water and electricity handy.
  • Piping water to the barnyard—it has saved us carrying countless buckets in freezing weather.
  • Running electricity to the barn—enabling us to have motion-detector security lights, unfrozen water in the winter, and a barn ceiling fan for hot weather.  A future project is to connect it up to the brooder house so we won’t need to run multiple extension cords.
  • Getting a head gate set up with a chute, small round pen and simple sweep gate.

10)  Doing this!  We love what we are doing for ourselves, for our children and grandchildren, for our animals, for this bit of creation God has given us to steward, and for friends and acquaintances we can share these blessings with.

Saturday, December 24, 2011

The Accidental Ham

Earlier in December, the hams I cured were ready to smoke.  They were just too big for me to handle from a wheelchair, so I had to pass the baton to Herb.  After all, it's really a fun process, and I knew he would enjoy doing it.

First, he rinsed the hams well, especially in all the cavities.  Jeff had opened them along the long bone and encouraged me to pack salt in there to encourage an even cure.

Next, Herb patted the hams dry with paper towels.

This shows how the meat pulled back from the joint bone during the curing process, which took hams that were slightly over 15 lbs. down to 13 and a half.

Here's the other end of one of the hams.

Early in the afternoon, Herb set up the smoker, put chunks of hickory in the bottom, and--once the smoke was drifting out--put the hams in the smoker.  Based on the amount of time it took the bacon, I figured the hams needed several hours.  So we went about our business, leaving the hams to soak up the delicious hickory smoke.

. . .

Herb fed the animals before it got dark and left for a meeting.  He got home about 9 p.m. and suddenly exclaimed, "The hams!"

Accompanied by my wails, he rushed out to unplug the smoker and haul out the darkened carcasses of our once-beautiful hams.  We were sick at heart!  How could we have forgotten them?  Herb stuck the lumps of meat in the fridge, more out of reflex than anything else, and we went to bed.

The next day I suggested that since Jim and Monique wanted their ham cut up and frozen in stew-sized chunks, why didn't we go ahead and cut one up and see if we could salvage any?
So Herb got out a knife, and to our delight, there was a beautiful, pink ham cooked to perfection inside that charred hunk of meat!  Little bits that fell off tasted amazing.  We couldn't believe it!  When I (finally) checked on the internet to see how long the hams should have been smoked, we found that the  8 hours they spent in the smoker was exactly the right amount of time.

So on Christmas Day, our accidental ham will be the centerpiece of our table, and we will thank God for ALL His goodness this past year.  That's no accident!

Saturday, December 17, 2011

Smoking Hot Bacon on a Freezing Cold Morning

Dec. 1 was a snappy cold morning with a heavy frost on the ground, and we got up before the sun came up.

Jenny went out to feed the animals in the barnyard while I got dog food ready in the house.

As soon as we'd fed the dogs and ourselves, we got to work on the bacon.  The first step was to rinse it, removing all of the curing salt.

Each plastic container that had held two slabs of bacon yielded about a half cup of liquid this time.  I had drained the bacon once before, but got only a little liquid.  This is liquid that was pulled out of the meat by the curing process.

There was less liquid to drain out of the bacon that had been cured in Ziploc bags, but that was because some leaked out onto the bottom of the fridge.  I personally found the Ziploc method not worth repeating.  The salt that rubbed against the "zippers" when putting the bacon into the bags made it impossible to close the bags tightly.  For the small investment, I much preferred the large rectangular plastic containers with lids.  I can easily stack and store them till they're needed next time.

Next we patted the slabs of bacon dry with paper towels and stacked them up to await their turn in the smoker.

We made foil packets of wood chips and poked holes in the top with a fork, laying them directly on the heating coil of the smoker.  We smoked two batches with applewood chips and two with hickory.

Once the smoke was evident, we put the bacon on the racks and closed the lid.

Then we set the timer for 45 minutes and waited . . .  Tai was very interested (and hopeful) about the whole project.

What a marvelous smell wafted forth!  We were feeling very interested and hopeful, too!

After we took the bacon out, I discovered that the electric coil was burning right through the foil which was then sticking to the coil.  I learned several things:
1)  Even when you think the packet of coals has cooled off, do NOT drop it into a plastic can lined with a plastic garbage bag!
2)  If the hot coals melt through the plastic bag and garbage can, do NOT dump them out inside the house!  Especially if your aim is bad and some misses the sink and ends up on the throw rug.

3)  Do NOT dump burning coals off a throw rug onto the vinyl floor!  It is much easier to replace a throw rug than to live with coal holes in the floor!

I also learned that chips placed directly on the coil make very good smoke because they catch on fire.  The bacon will still get smoked, but the fire isn't good for the paint on the smoker.

We have since purchased a stainless steel smoker box to hold chips when smoking for a short time, and we have switched to chunks of wood when smoking for a longer time (like for a ham).

I also learned that despite making a few silly mistakes, smoking turns out some beautiful-looking bacon!  Did you know that store-bought "Hickory Smoked Bacon" has probably never been near a wood chip, much less a smoking one?  An article from the University of Wisconsin-Madison magazine describes their bacon-curing class:  "The class observes how to add flavor using an injector machine, a method that replicates the results of older and much slower practices of dry curing. The pork belly moves along a conveyor belt beneath a row of pumping needles connected to hoses that deliver water and a foamy mixture containing the liquid smoke. While the smoky smell is almost overpowering, there’s no smoke anywhere."

Yum!  Just think about it--when did you last see bacon that looks like this in a grocery store?  I assure you, smoking involves heat which partially cooks the bacon, so if your bacon is pink and raw-looking, it has more likely been poked than smoked!

Once the bacon was cooled, I packaged it with our Vacmaster Pro.  I love using the bags with a ziploc on one end because that way you can remove the bacon, slice some off and return it to the fridge.

After marking the packages with weight, wood flavor and date, we put them into the freezer.

Except, of course, for one slab that we couldn't wait to try for breakfast the next morning!

Tuesday, December 6, 2011

Curing Bacon at Home

Over a year ago I had bought some pork belly at Nature's Harmony Farm.  Unsure what to do with it, I kept it in the freezer all this time.  Recently I had the motivation to figure out how to cure it, with our own pork ready to be brought home in a few days.  So I researched recipes online and used them as a basis to create my own homemade bacon cure.

The ingredients:
1/2 c. kosher salt
1 1/2 cloves of fresh garlic, crushed
2 small sprigs of fresh rosemary
1 sprig of fresh thyme, crumbled to remove leaves
1 bay leaf
10 juniper berries
fresh ground pepper

I hand ground the garlic and herbs with a mortar and pestle, then blended them with the salt.

Some recipes use glass or plastic containers; others use ziploc bags.  I chose the container method for my bacon.  I cut a new plastic sink liner in pieces and used a piece to raise the bacon up out of any liquid that would drain out during the curing process.

Next I rubbed the curing salt all over the pork belly and into any crevices, then closed the container and put it in the fridge.

Two days later I drained off the small amount of fluid that had collected in the bottom of the container and reapplied the curing salt.

After five days I could see that no more liquid was draining out, and the bacon was quite a bit firmer than it had been at first.  The final step was to thoroughly rinse the bacon, pat it dry, and smoke it for 2 hours with hickory chips.

A few days later when Herb came home for Thanksgiving, he cooked the bacon for breakfast.

We learned a few things from this experiment:
(1) The ideal time for curing the bacon is 3 to 5 days;
(2) one hour is long enough to smoke it, and
(3) it was truly delicious, and we can't wait to taste our own bacon!